Installing OpenWrt on Archer C7
- Posted in:
- OpenWrt
In this post I will explain how to install OpenWrt on TP-Link Archer C7 but in general it can apply to any router.
Perparation
Before you start upgrading your router to OpenWrt you have to check following things:
- Make sure that are still will be able to connect to internet when your router is offline. For example, you can connect your phone to your computer, or you can create hotspot on your phone and connect to it. This is necessary because you may need to troubleshoot or ask some questions etc. So, go ahead, power off your router and make sure that still able to connect to internet. If you are using your phone and have data limit, please do not use youtube or something like that as it consumes a lot of traffic. If you have to use youtube then reduce quality of video a lot.
- Save all setting you have on your current router. It could be username and password for your internet provider. Perhaps your current Wi-Fi settings. Just in case you can go thru all settings and make screenshot of every single page. You never know.
- Also, before you start you need to check how to revert to factory firmware. My understanding that for Archer C7 you just need to flash factory firmware: https://openwrt.org/toh/tp-link/archer-c5-c7-wdr7500#return_to_factory_firmware. It is good idea to download original firmware before you start upgrading to OpenWrt. Just in case.
Now you should search for “Archer C7 OpenWrt” without quotes. And first page https://openwrt.org/toh/tp-link/archer-c7-1750 is the one we are looking for.
As you can see on this page there are multiple hardware versions of Archer C7 router:

As you can see here all hardware versions is supported by latest OpenWrt version. You should only flash version that is compatible with version of your router. As you can see on photo below, I have V5 version:

Now you have to click on Technical Data column for row that correspond to version of your router’s hardware. For me it will be https://openwrt.org/toh/hwdata/tp-link/tp-link_archer_c7_v5 Just double check that everything is supported by searching “Unsupported Functions”. For example, I have router that listed Wi-Fi and USB as unsupported in OpenWrt. Here is link: https://openwrt.org/toh/hwdata/netgear/netgear_wndr3400_v3
And here is example of unsupported features:

Now you have to search for “Firmware OpenWrt Install URL”. This will lead you to download link for installing OpenWrt. When you would like to upgrade already installed OpenWrt to next version then you have to use “Firmware OpenWrt Upgrade URL”. Please do not use anything that have word “snapshot”.

Download file from “Firmware OpenWrt Install URL” and save it somewhere.
Installing OpenWrt
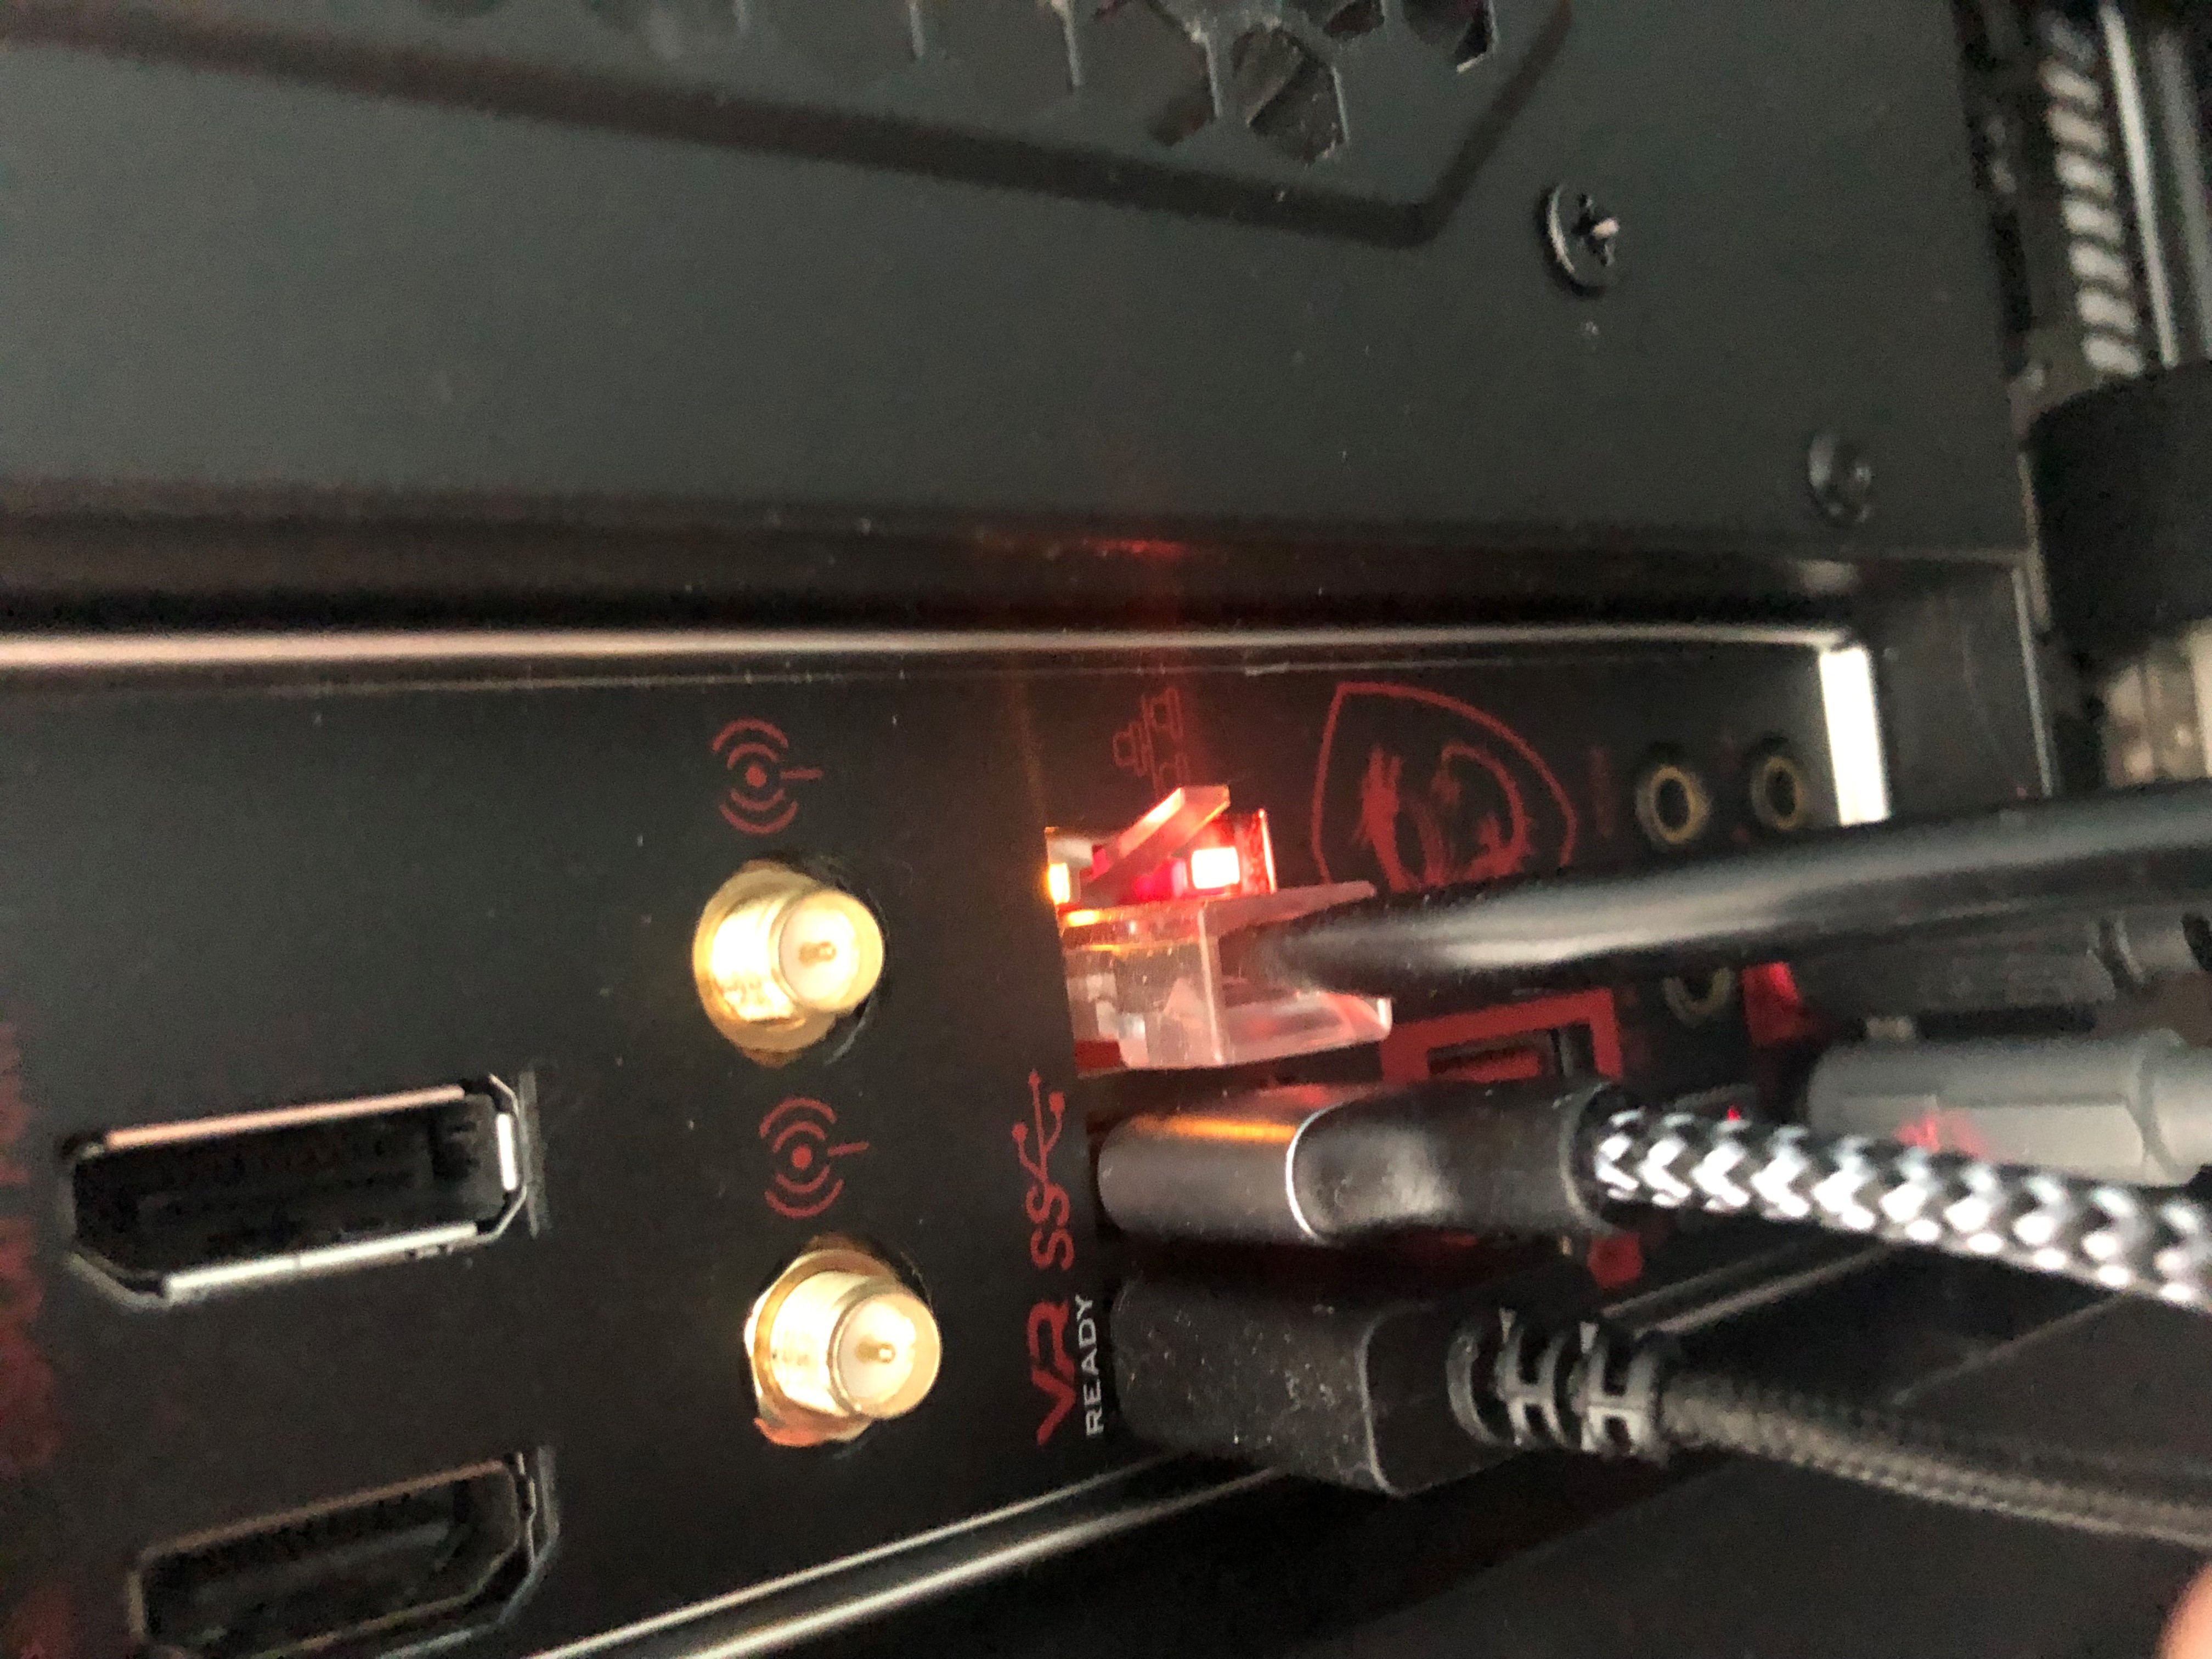
It is not recommended to update router firmware over Wi-Fi as after OpenWrt installs, there will be no Wi-Fi support and there will be only one way to configure router: over ethernet. And most vendor also do not recommend updating router over Wi-Fi. If you don’t have Ethernet port, I suggest buying used USB network card. I have ethernet and I did plug on side of the cable into my computer:
And another side into any ethernet port of your router (I used second port):
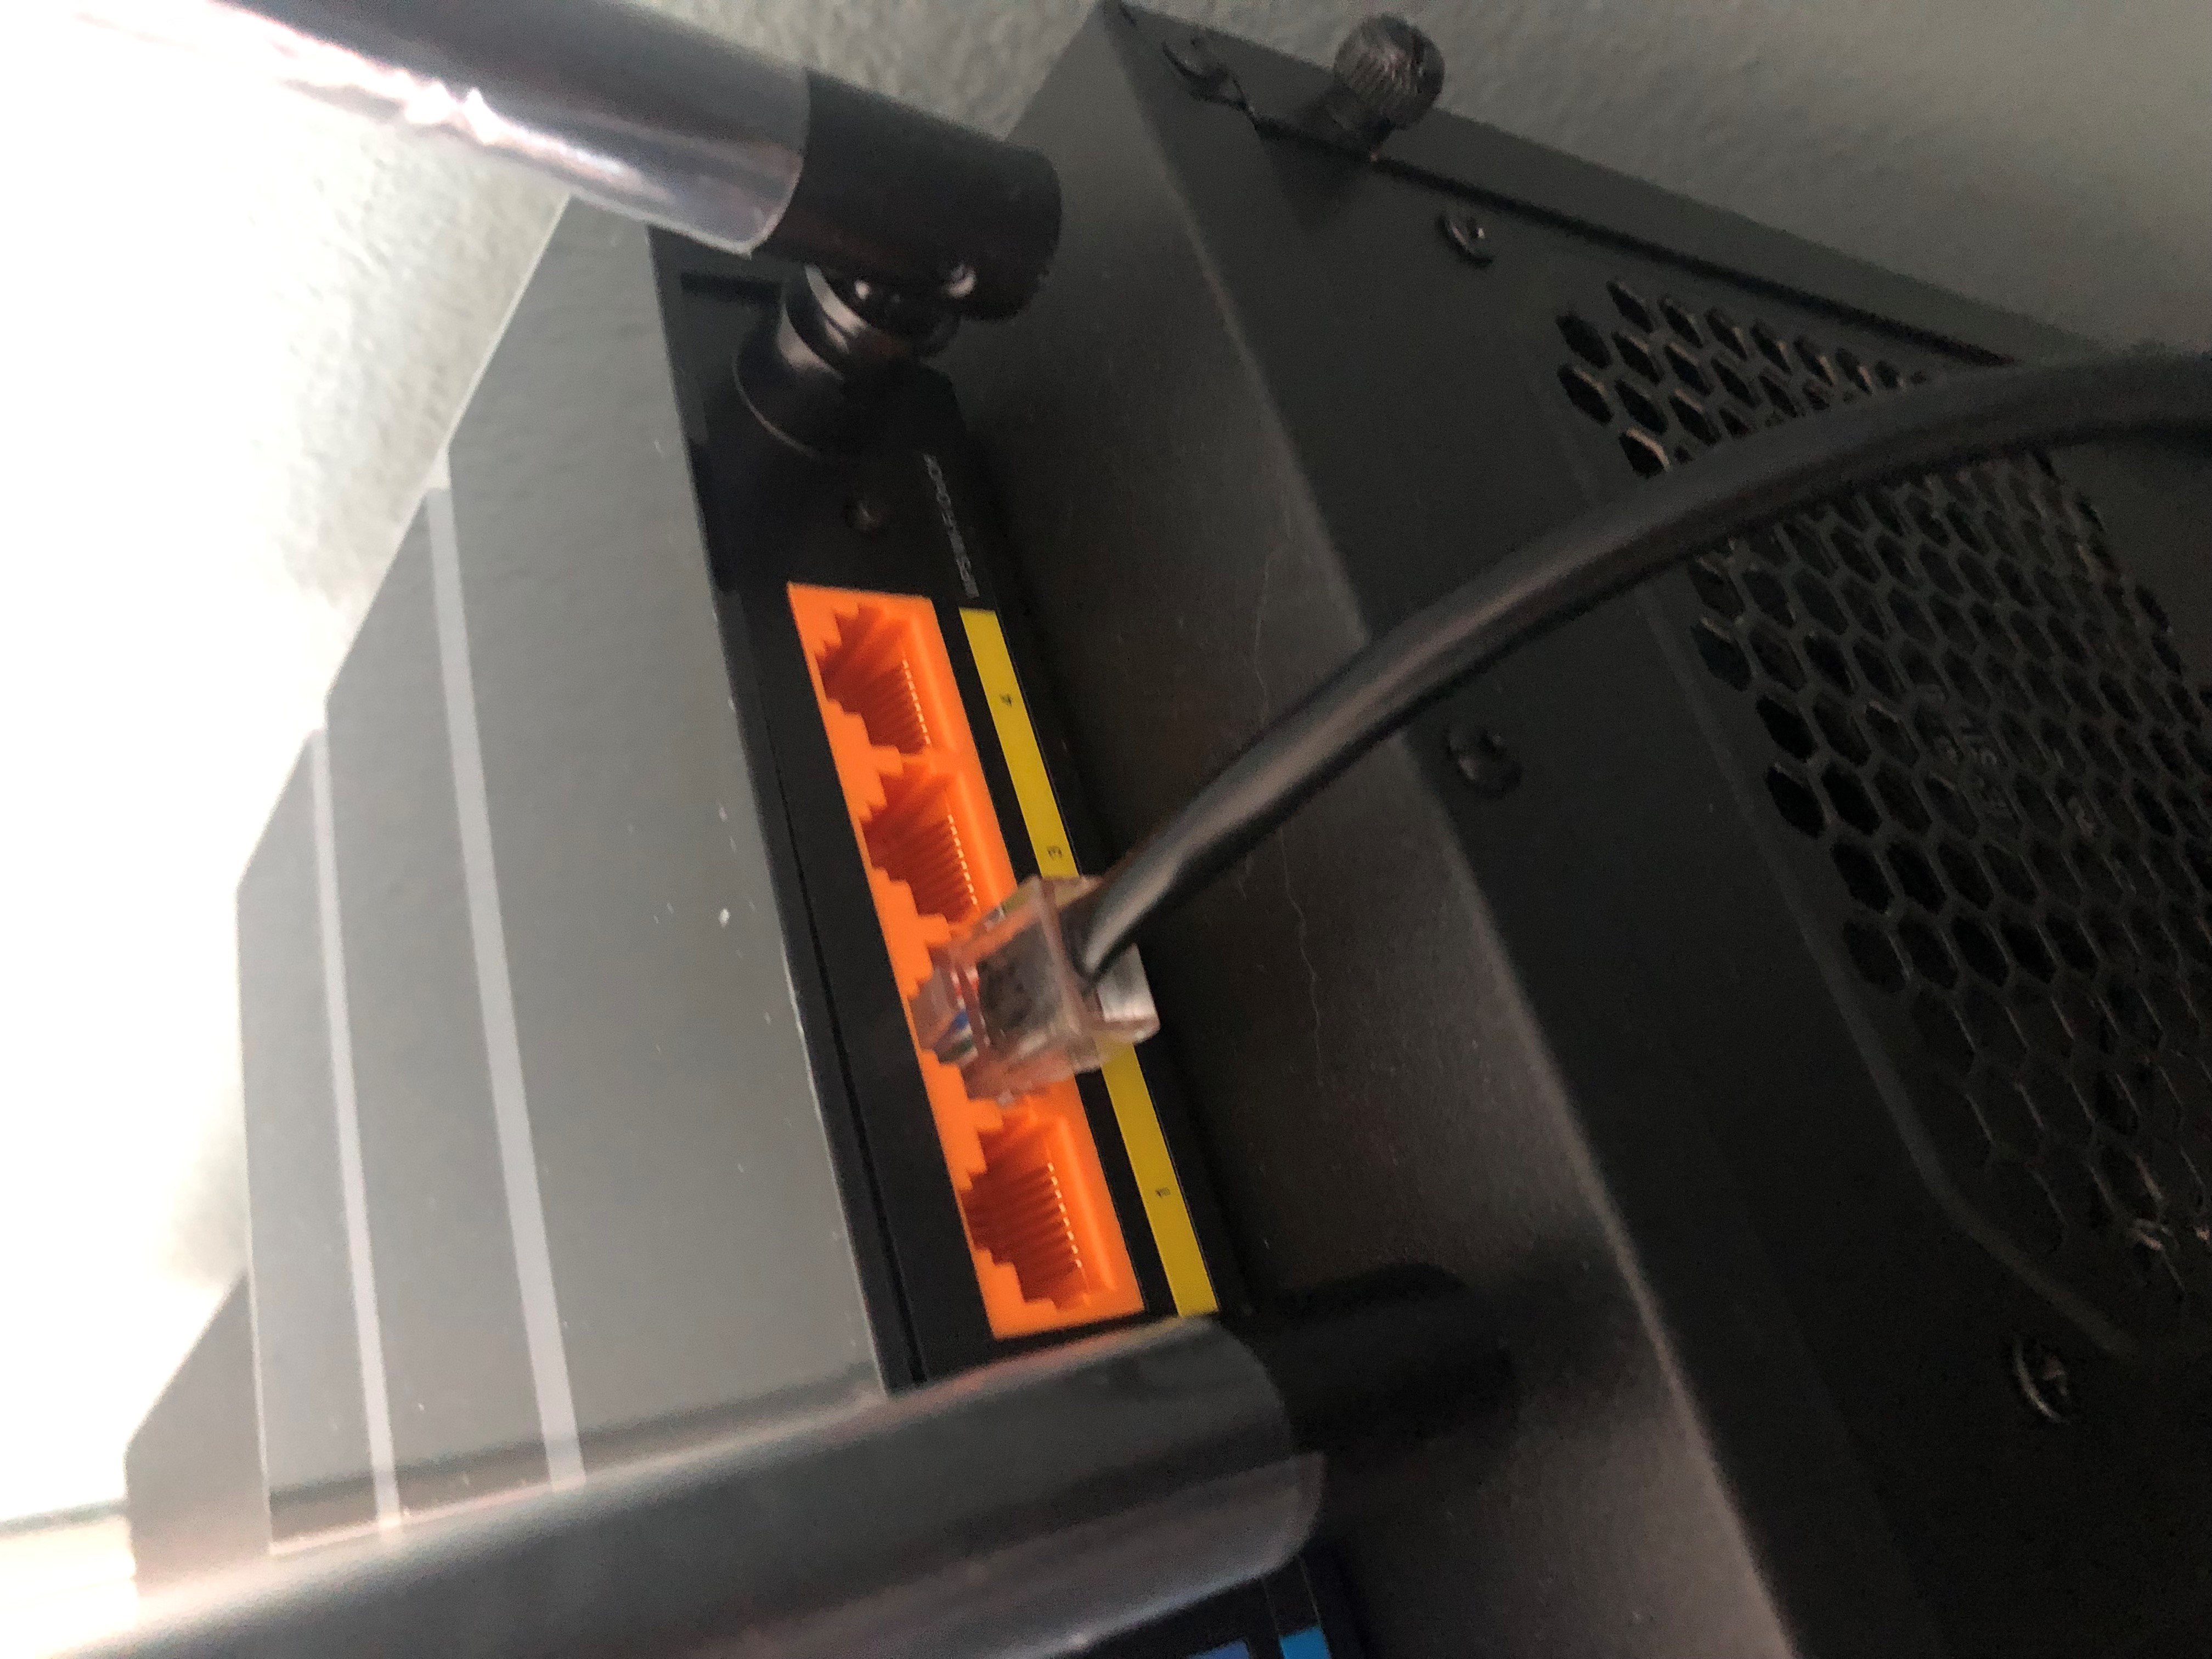
Please do not use Internet port as it designed to connect to your modem or directly to ethernet cable of your internet provider. And as you can see, I used my cable I had before, because it is black and cable that was supplied with router is white.
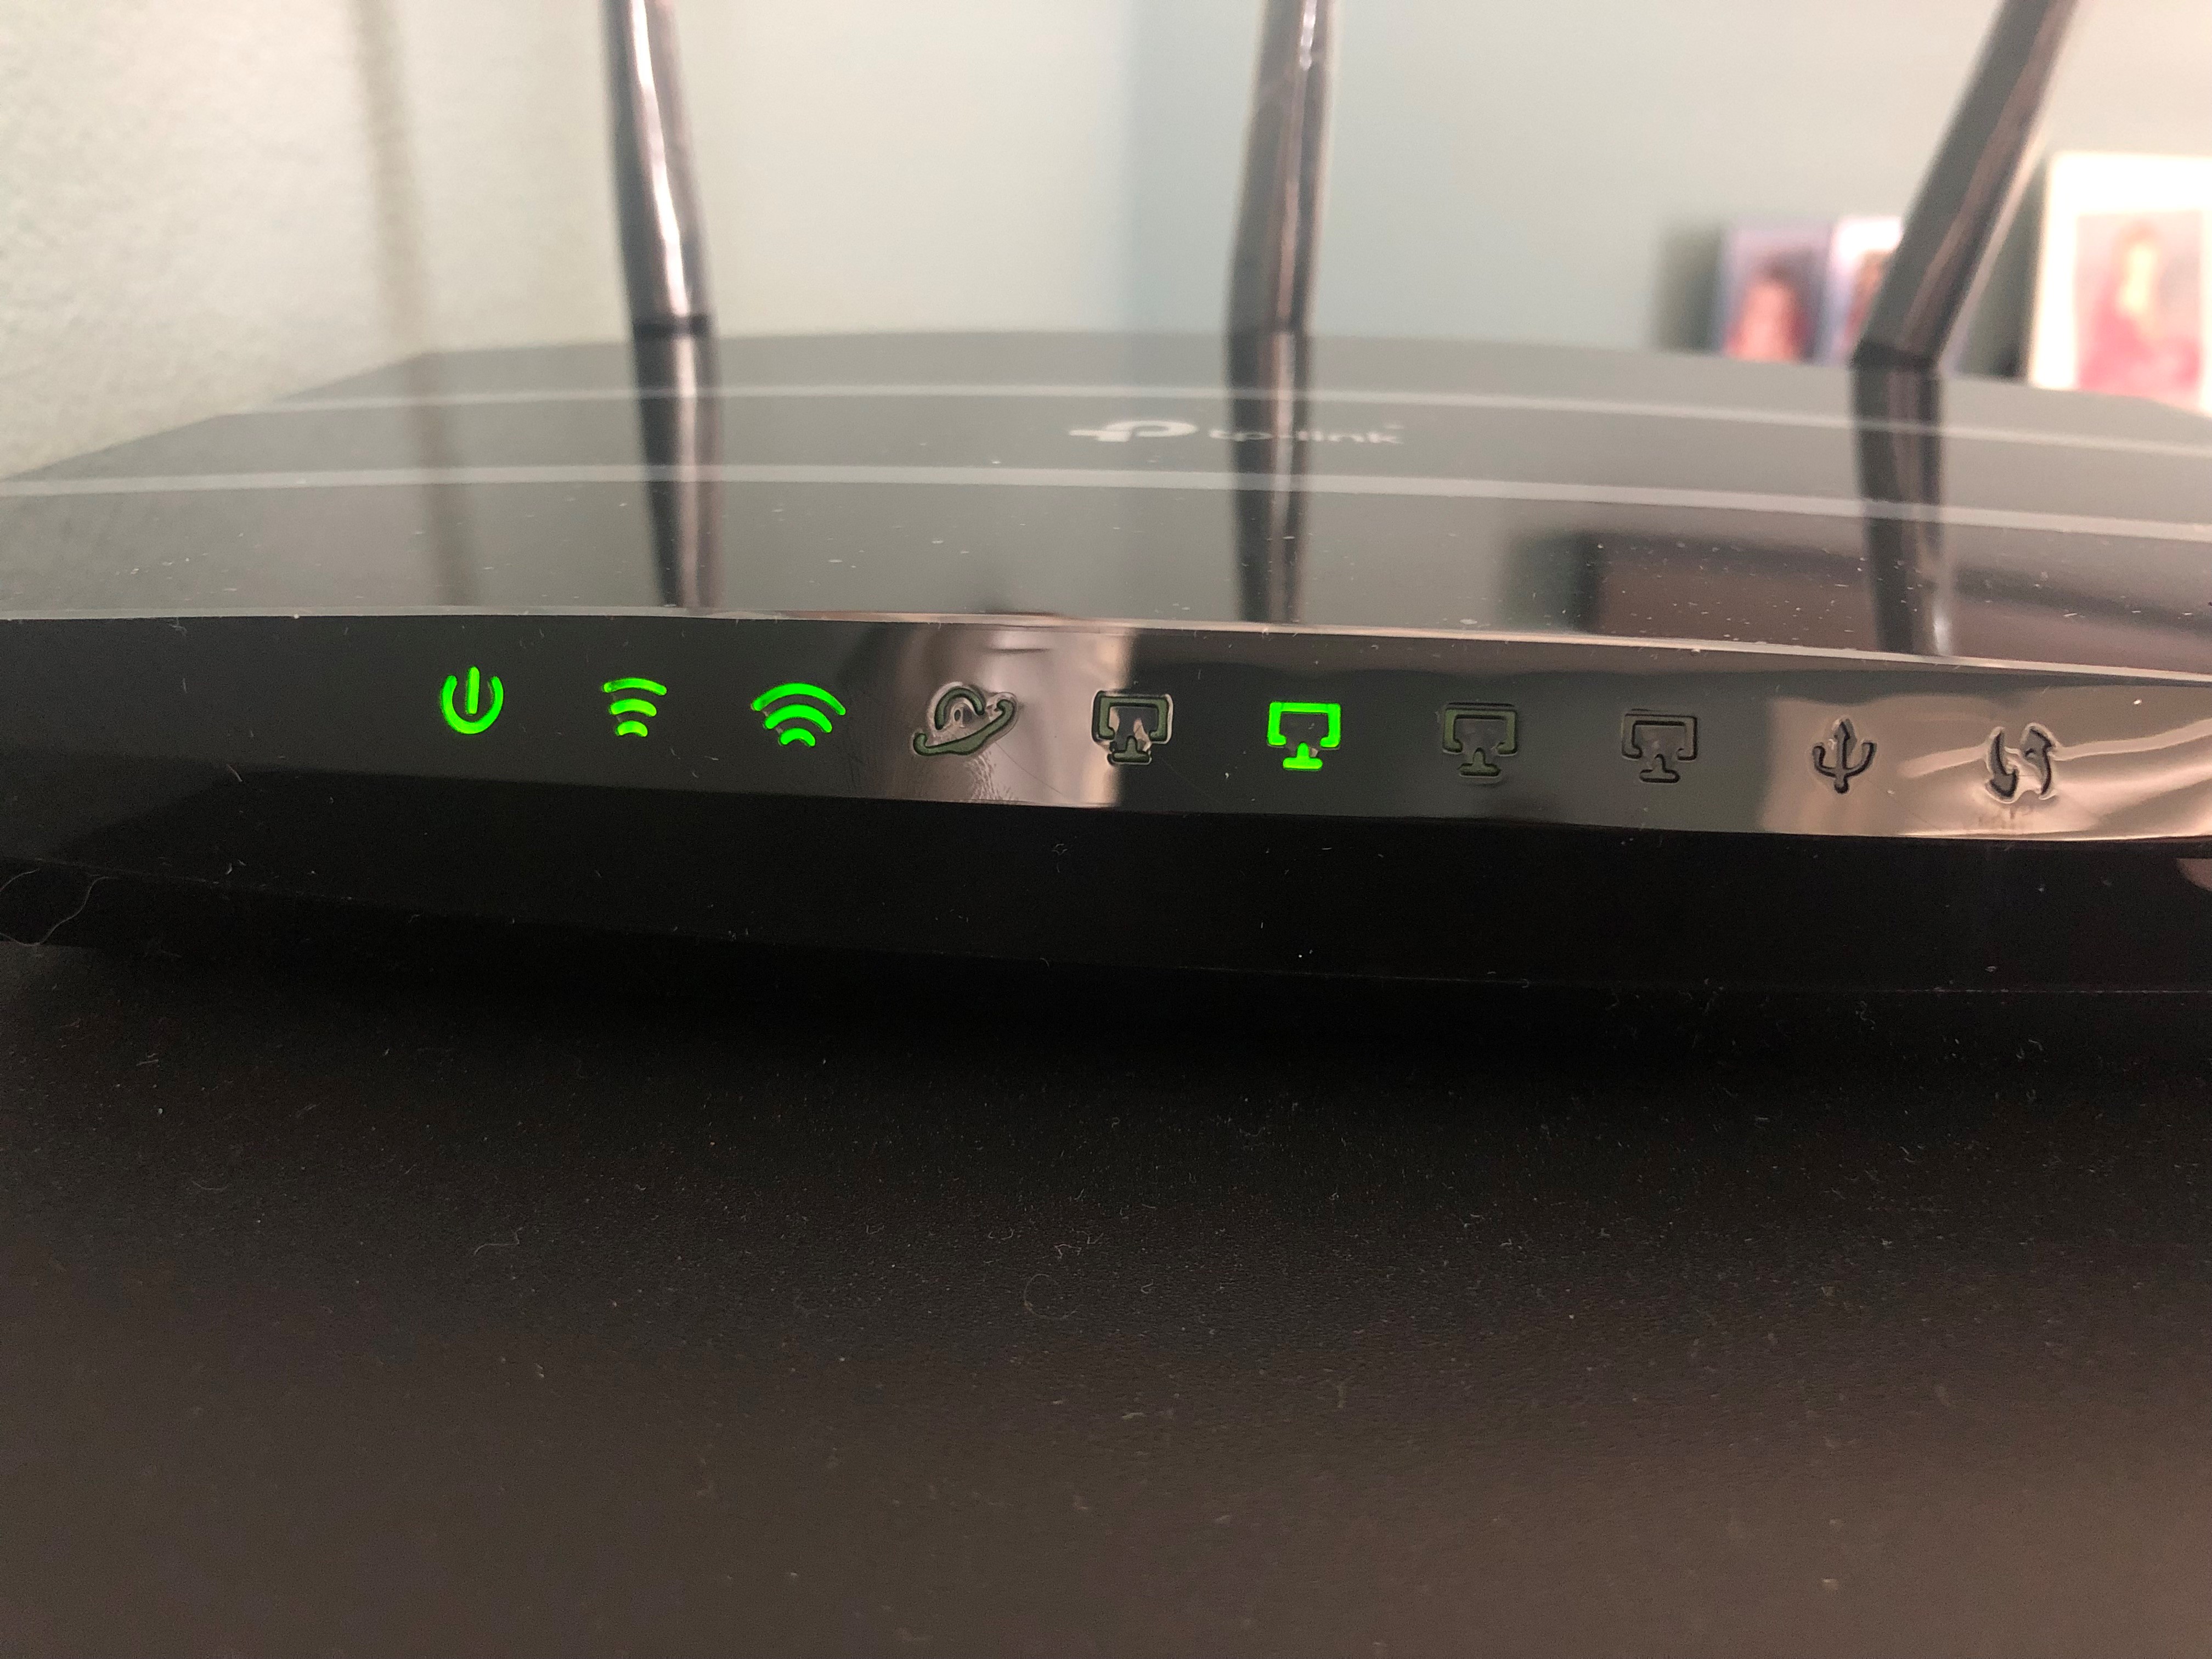
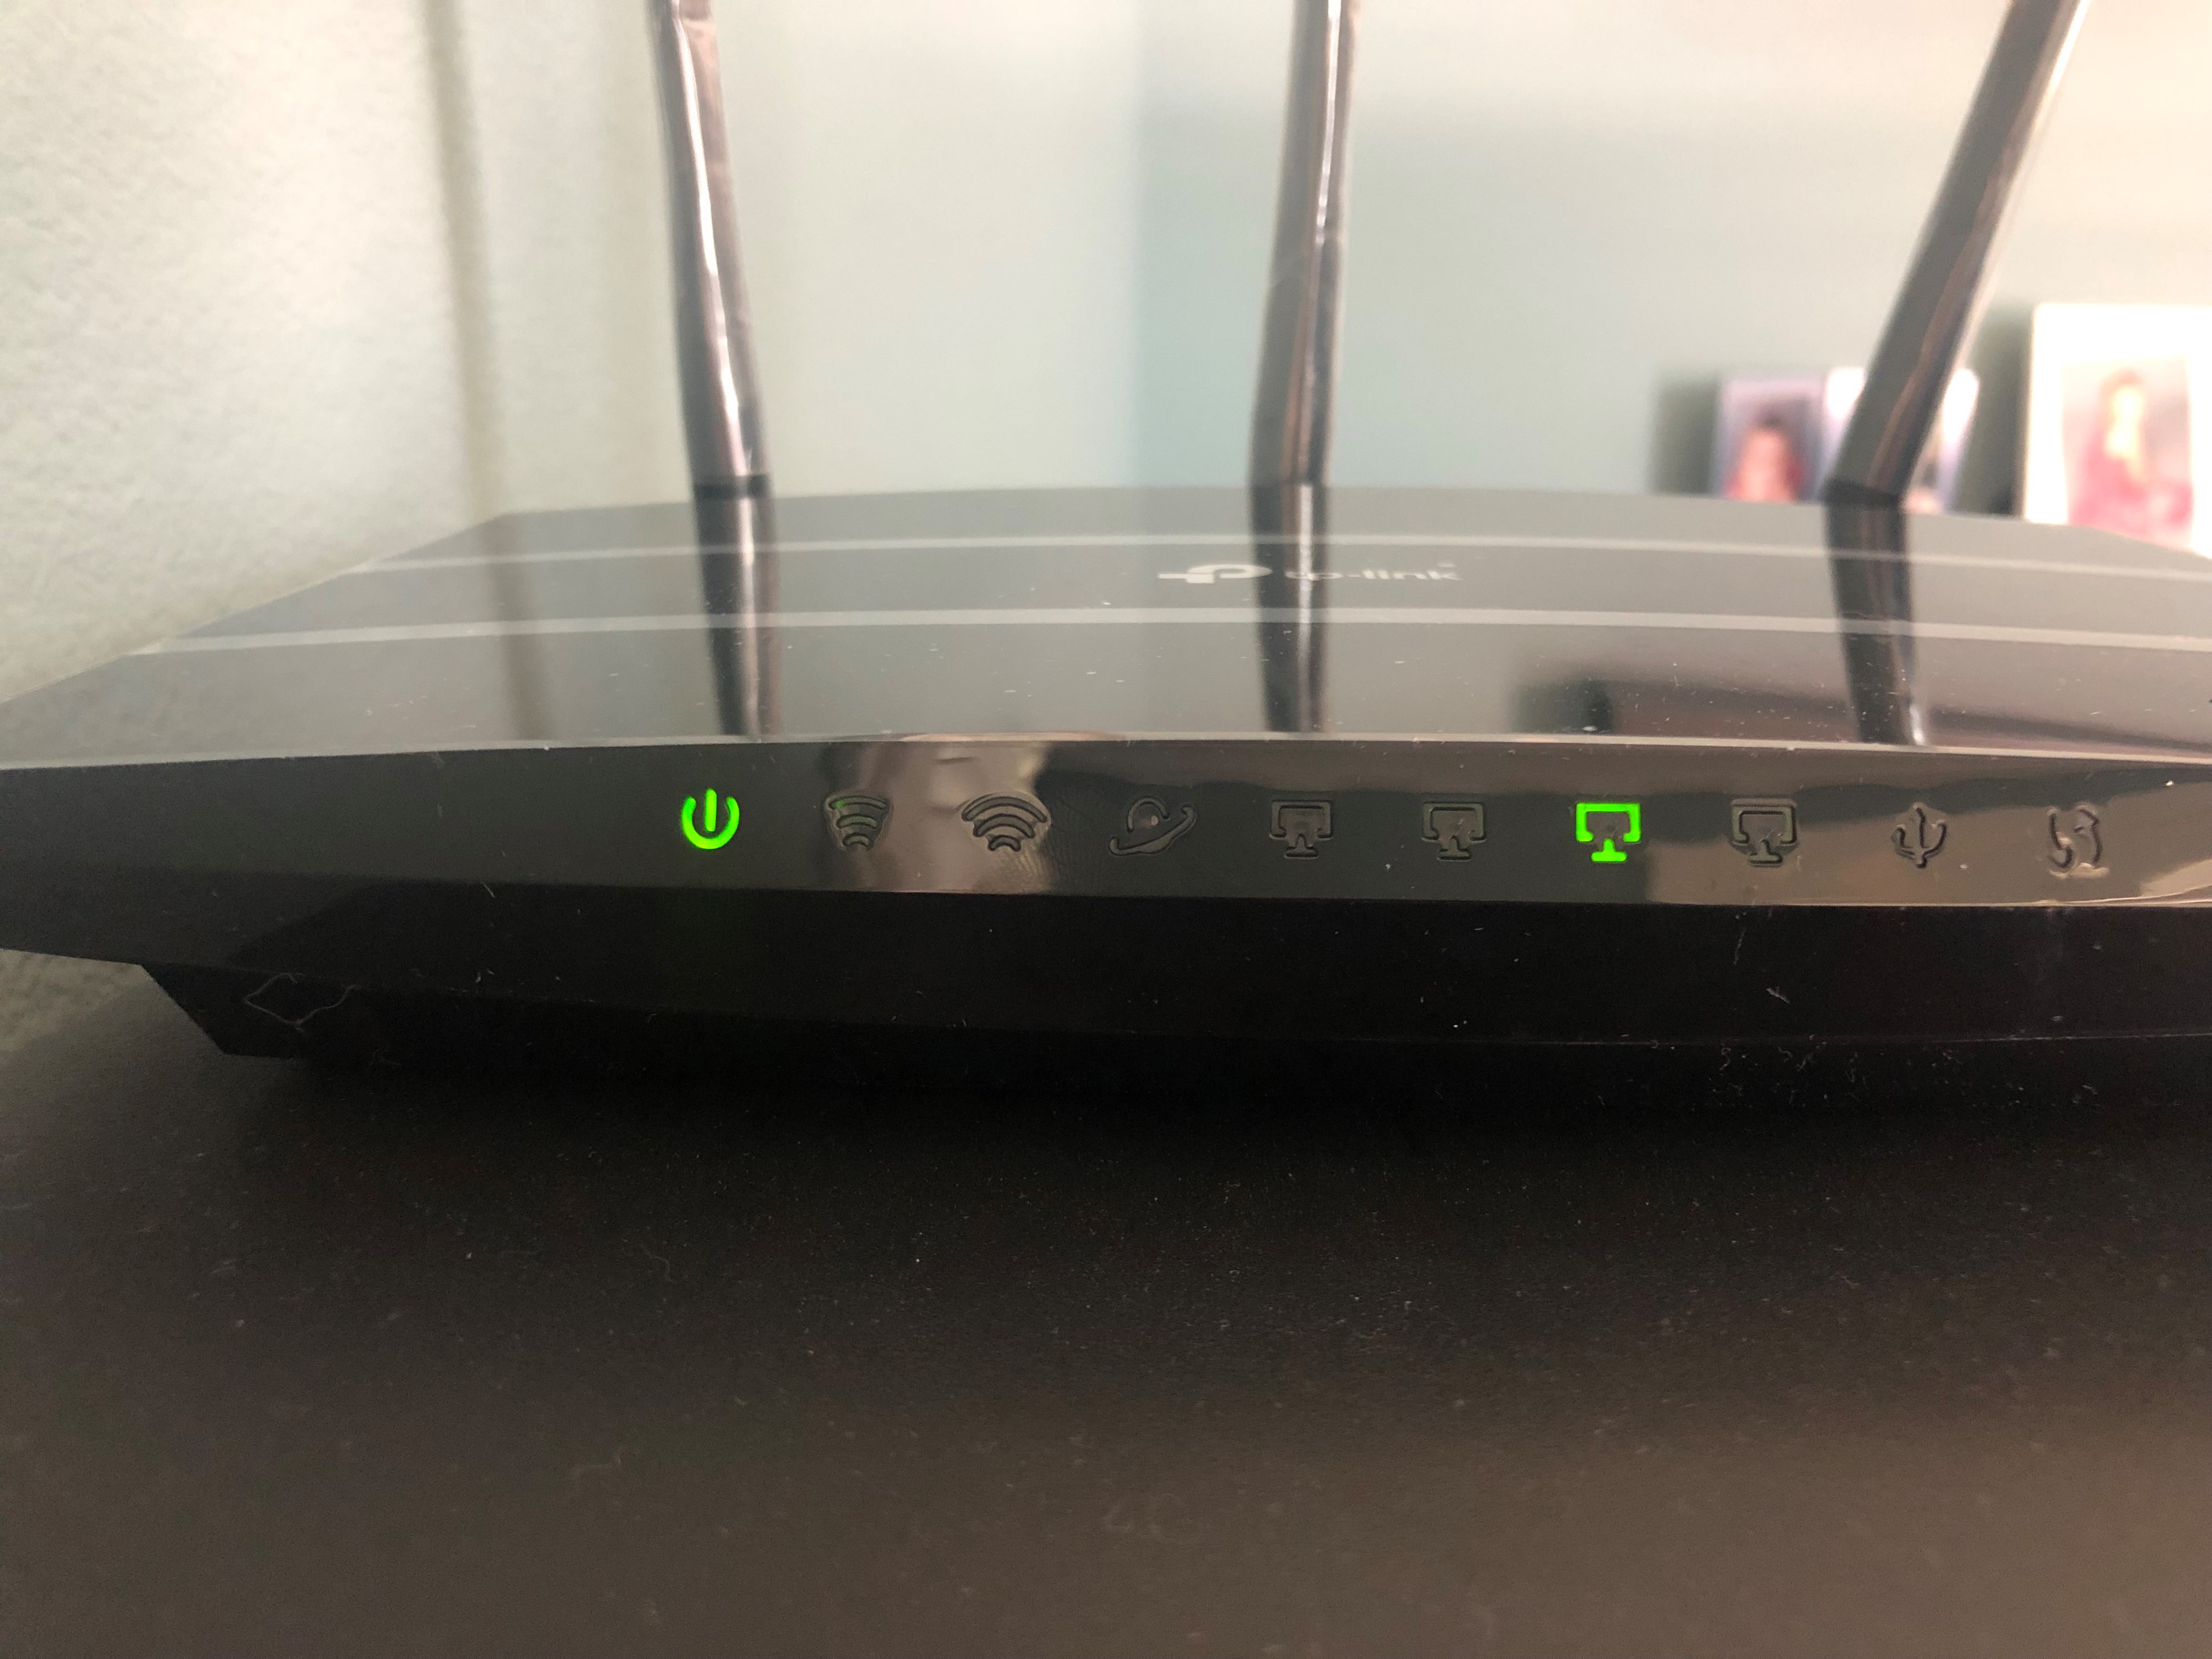
Now you can power on your router. You have to wait until power LED will stop flashing and there will be light for ethernet port you plugged your computer. I did plug ethernet cable to port #2 and as you can see port #2 LED is on:
Next step will be to verify that you received IP address from your router. For this you need to start Command Prompt in Windows and type following command:
Ipconfig
And press Enter. You should see something like this:
Ethernet adapter Ethernet:
Connection-specific DNS Suffix . :
IPv6 Address. . . . . . . . . . . : 2605:e000:1b0a:885a::33
IPv6 Address. . . . . . . . . . . : fd59:4601:938c::33
Link-local IPv6 Address . . . . . : fe80::30bc:a152:c85c:7f00%6
IPv4 Address. . . . . . . . . . . : 192.168.0.130
Subnet Mask . . . . . . . . . . . : 255.255.255.0
Default Gateway . . . . . . . . . : 192.168.0.1
As you can see my computer received “IPv4 Address” and it is 192.168.0.130 and that my router has IP address 192.168.0.1 as is typical for TP-Link routers. If for whatever reason it didn’t receive IP address, or it starts from 168 then try to type this:
Ipconfig /renew
If it still doesn’t then you make sure that cable is connected properly, and cable is not broken. Also, your computer can be configured with static address and changing it is actually different topic. Search internet on how to change your Ethernet adapter to use automatic IP address assignment.
Now start any browser and type your router’s address in browser’s address bar:
http://192.168.0.1
And press Enter. As I can have brand new router I will see something like this:
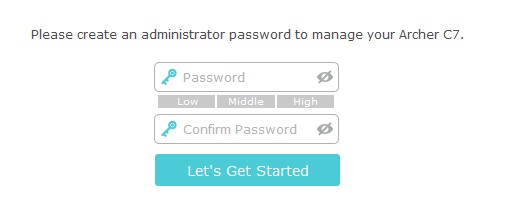
Here you have to create password for your router. Provide some password twice and press “Let’s Get Started”. Then router will bring configuration wizard but because we will install OpenWrt and this process will erase everything there is no point configuring it. So, click Exit button. If you already did setup your router then you have to login and continue. On the top you will see tabs:

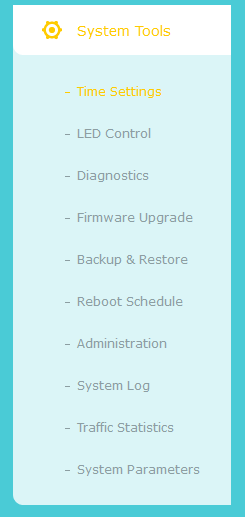
Click on Advanced tab. One the left you will see more tabs. Click on System Tools and there you will “Firmware upgrade”:
Click on it and you will see this on the bottom of the page:
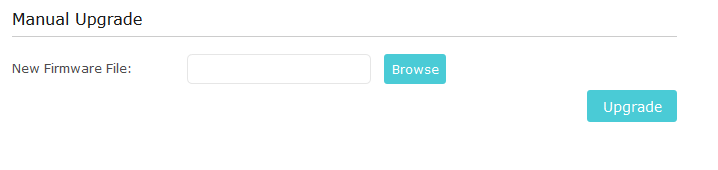
Click on Browse and select file you downloaded before. In my case it is file openwrt-18.06.2-ar71xx-generic-archer-c7-v5-squashfs-factory.bin
Then click on Upgrade button. Press Yes in next dialog.
Router will start upgrade process:

And power LED will start flashing. It will flash slowly then faster, then slowly again and it will repeat multiple times. It will take about 4 – 5 minutes. You will see that ethernet port #2 LED is on again:
Then wait 1 – 2 minutes after that and it should be done. In your browser you will error message that connection was timed out because router changed IP address and browser didn’t know about that. Now run following command in Command Prompt:
Ipconfig
And press Enter. You will see something like this:
Ethernet adapter Ethernet:
Connection-specific DNS Suffix . : lan
IPv6 Address. . . . . . . . . . . : 2605:e000:1b0a:865b::32
IPv6 Address. . . . . . . . . . . : fd09:5a28:e11c::b1e
IPv6 Address. . . . . . . . . . . : fd58:3803:857e::31
Link-local IPv6 Address . . . . . : fb81::41bd:b245:b96a:6a00%4
IPv4 Address. . . . . . . . . . . : 192.168.1.182
Subnet Mask . . . . . . . . . . . : 255.255.255.0
Default Gateway . . . . . . . . . : 192.168.1.1
As you can see your IP4 Address changed and now it is 192.168.1.182. Also, your router’s address changed as well, and it is 192.168.1.1 now. Everything looks nice and it is time to connect to your router in your browser. Type your router’s address in browser’s address bar:
http://192.168.1.1
And press Enter. You will something like this:
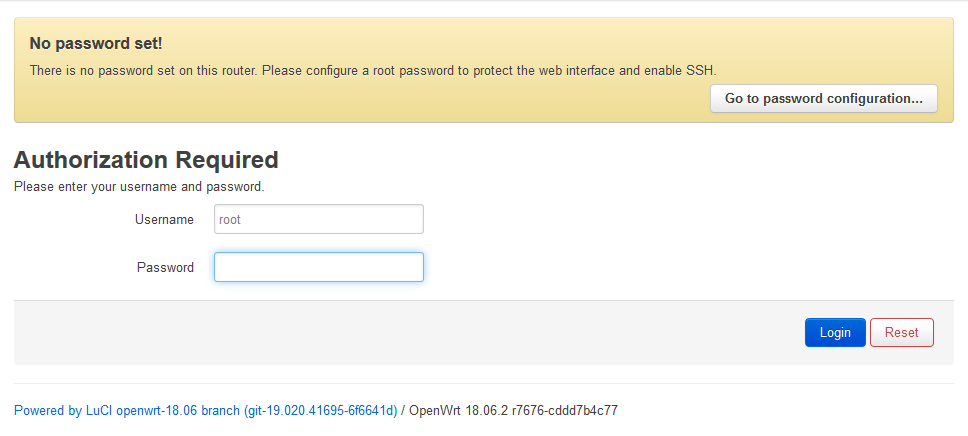
And it means that OpenWrt up and running. Now click on Login and you will be redirected to admin page where you should set password and then click on Save & Apply. After that you are ready to use your router in OpenWrt.
Final steps
Now if you check LED lights on your router you will probably realize that there is no Wi-Fi enabled because there are no lights for it. And it is yet another reason why you should not upgrade router over Wi-Fi. Let’s add Wi-Fi. On the top of router’s interface, you will see something like this:

Move mouse over Network menu, it will expand and there click on Wireless sub-menu. And you will see something like this:
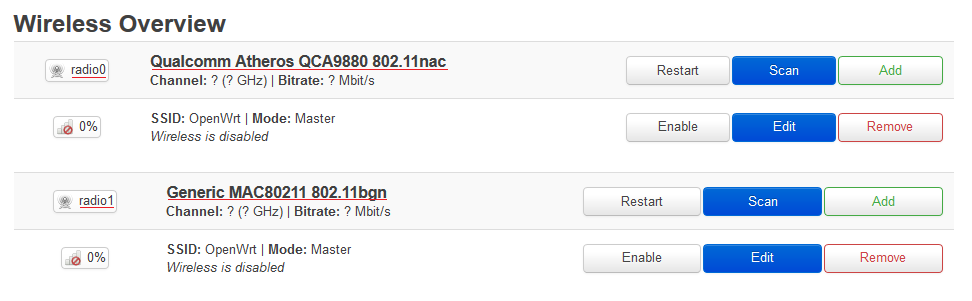
You can see two Wi-Fi radios: radio0 for 5 GHz (Qualcomm Atheros QCA9880 802.11nac) and radio1 for 2.4GHz (Generic MAC80211 802.11bgn). Let’s start from 5Ghz. Click on Edit button for radio0 and you will see something like this:
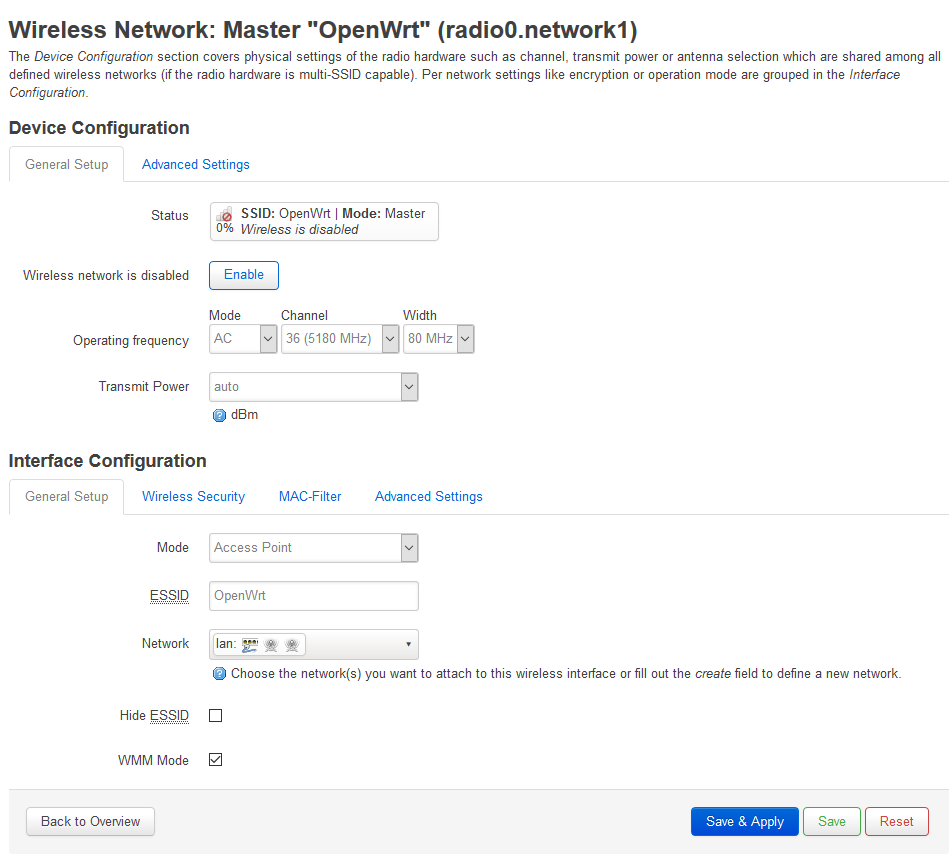
You have to edit ESSID and change it to something else. For example, type Home5Ghz or anything else you wish. You will see name of this network when you will try to join this Wi-Fi network. Then click on Wireless Security tab. In Encryption select WPA2-PSK and type password in Key field. Then click on Save & Apply. Then click on Edit button for radio1. You will see something like this:
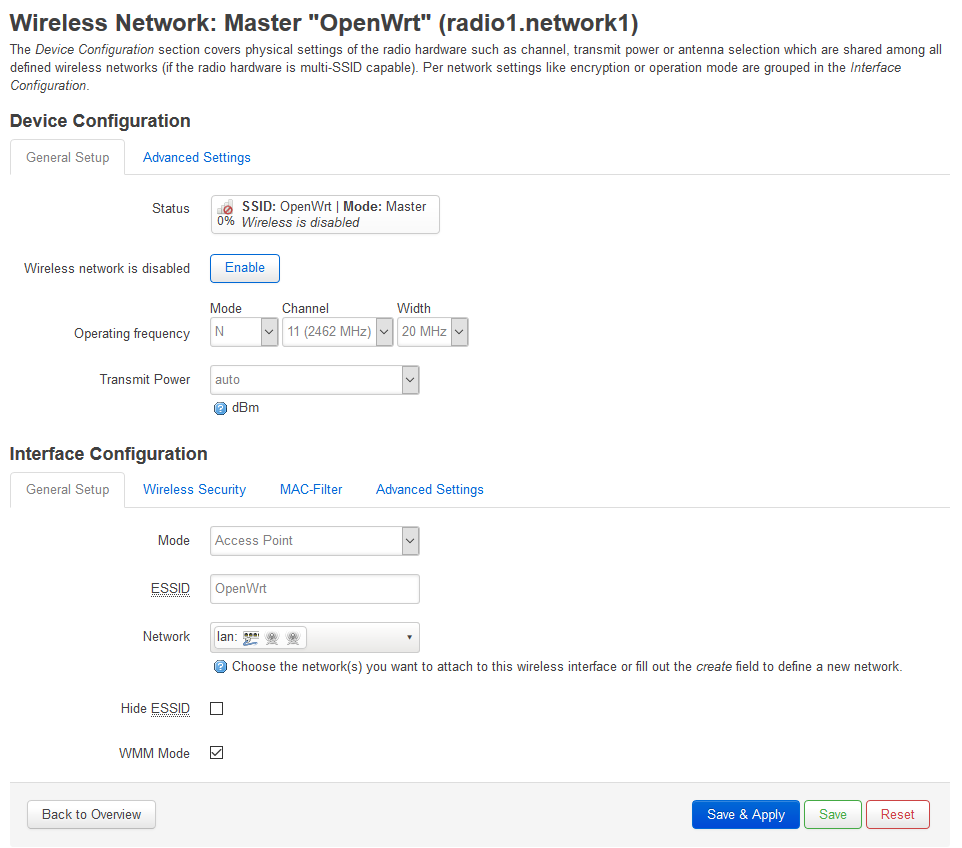
And do the same but use different ESSID. For example, Home or Home24Ghz. Then click on Wireless Security tab. In Encryption select WPA2-PSK and type password in Key field. Then click on Save & Apply. And now it is time to enable Wi-Fi. Click on Enable button for radio0 and then on Enable button for radio1. You can see that both Wi-Fi LEDS are on after you did that. After that you can use Wi-Fi on your OpenWrt router.
There are lot of other topics to talk about in future but even in current state for many people it will be enough. Enjoy your new router!